Beginner
⏱️ 2 minutes
📂 basics
Uploading Audio Files to Memoro
Learn how to upload and process audio files in Memoro
Last updated:
In Memoro, you can easily upload audio files and have them automatically transcribed. This guide shows you the different ways to do this.
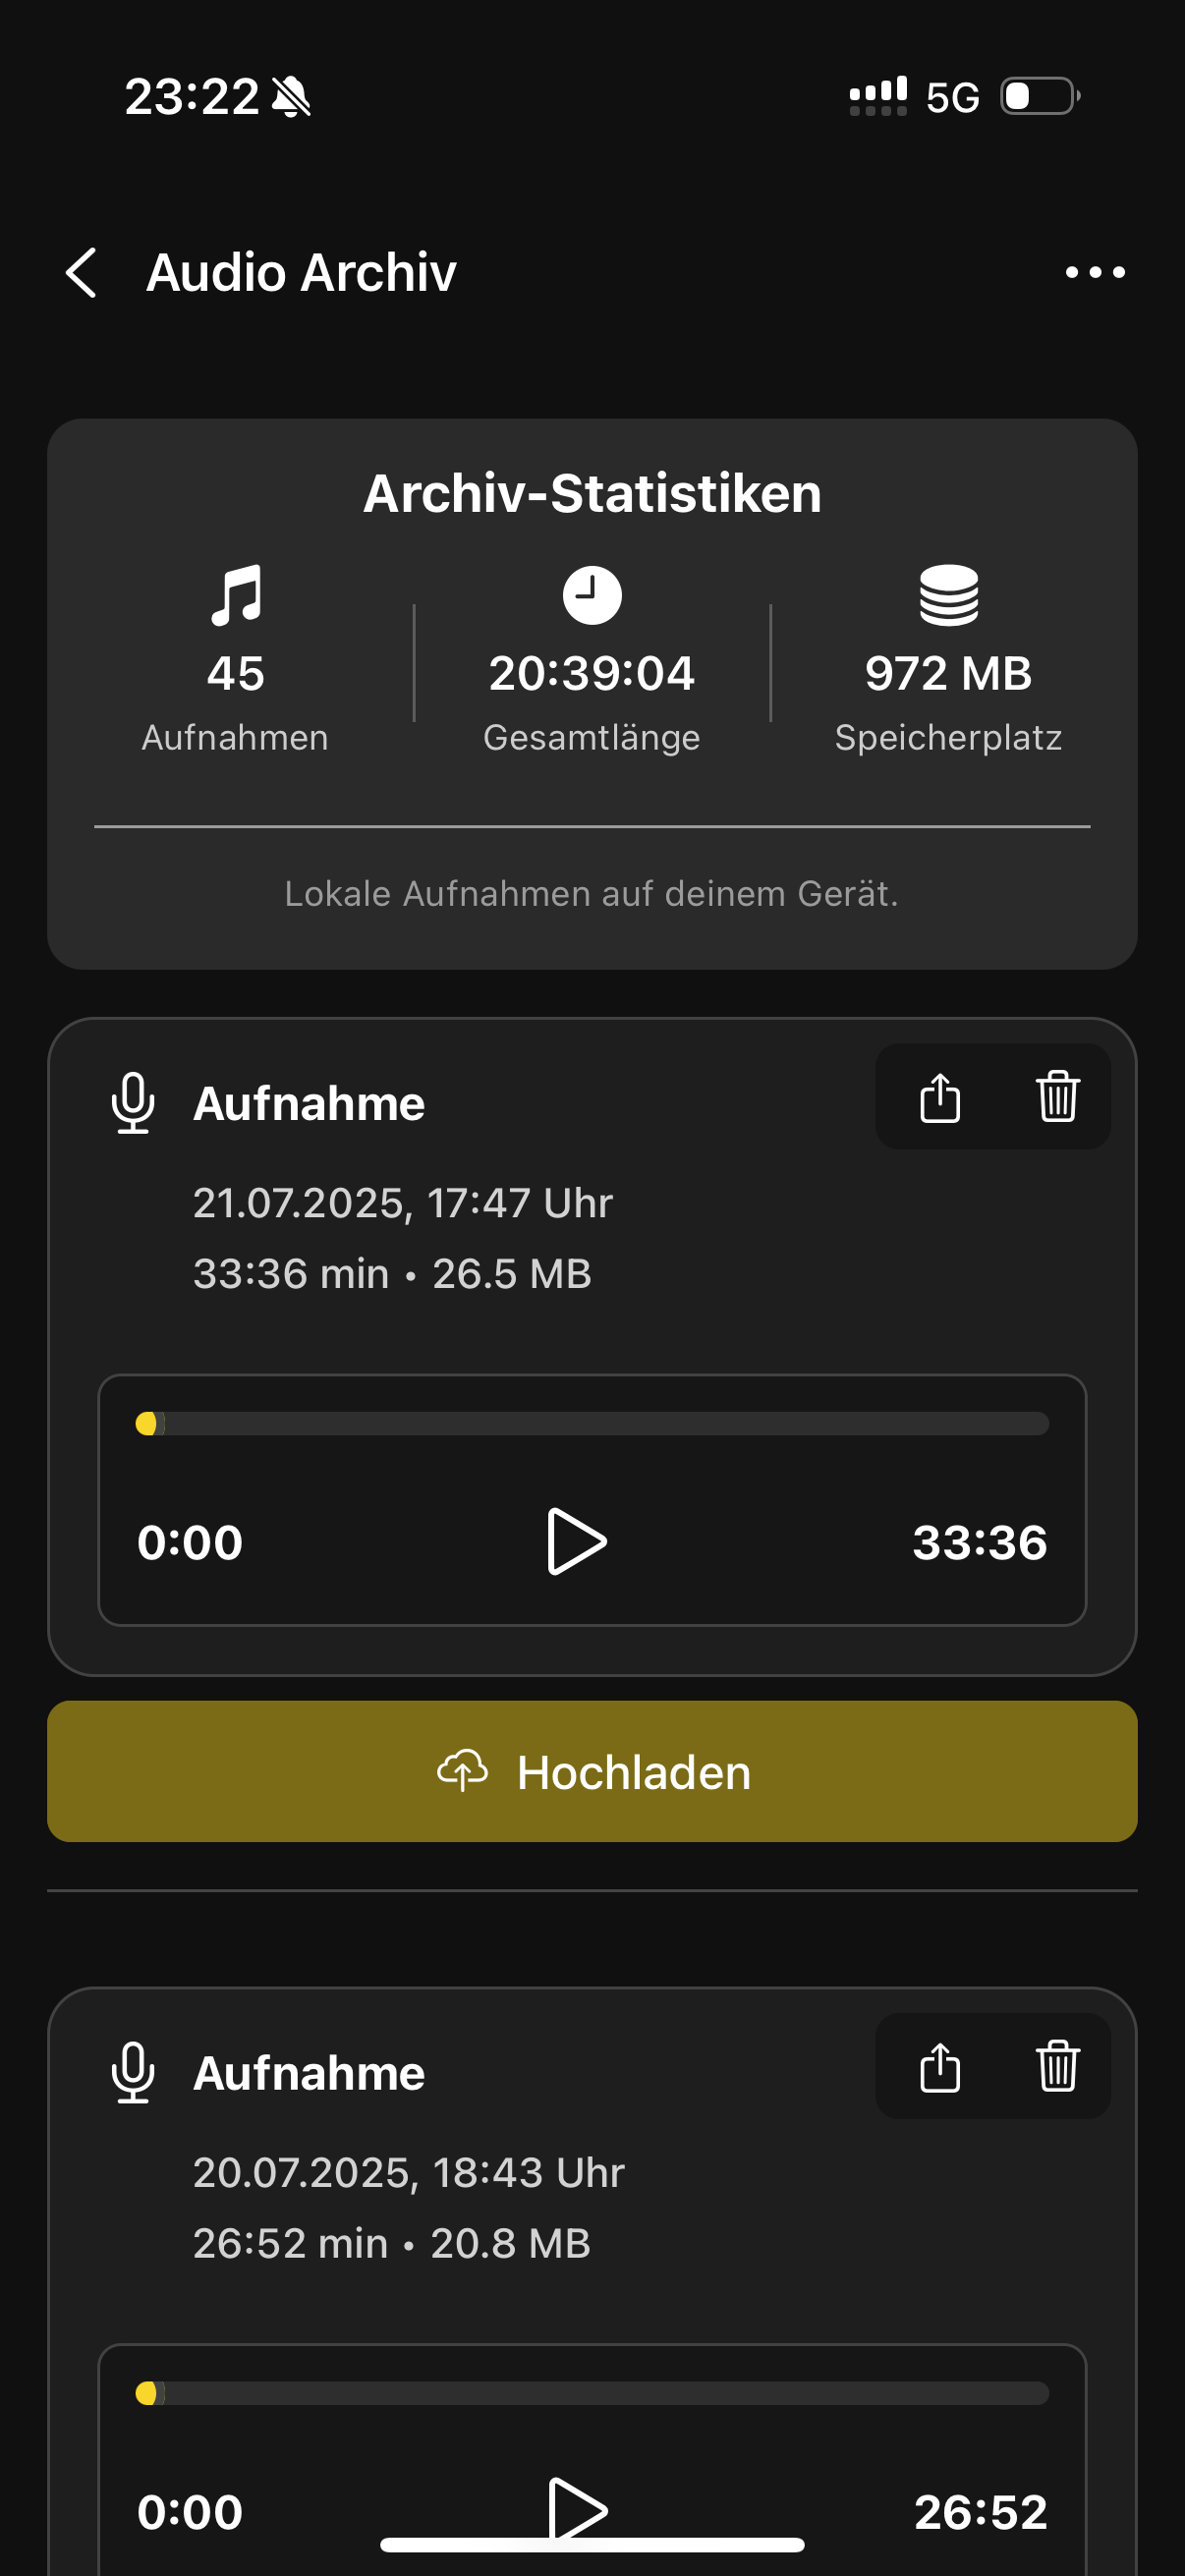
📂 Accessing the Upload Feature
Two ways to upload:
- Via Main Menu - Click the three-dots menu in the top right corner of the app
- Via Memos Page - Tap the audio archive icon (cloud with arrow) at the top
⚙️ The Upload Dialog
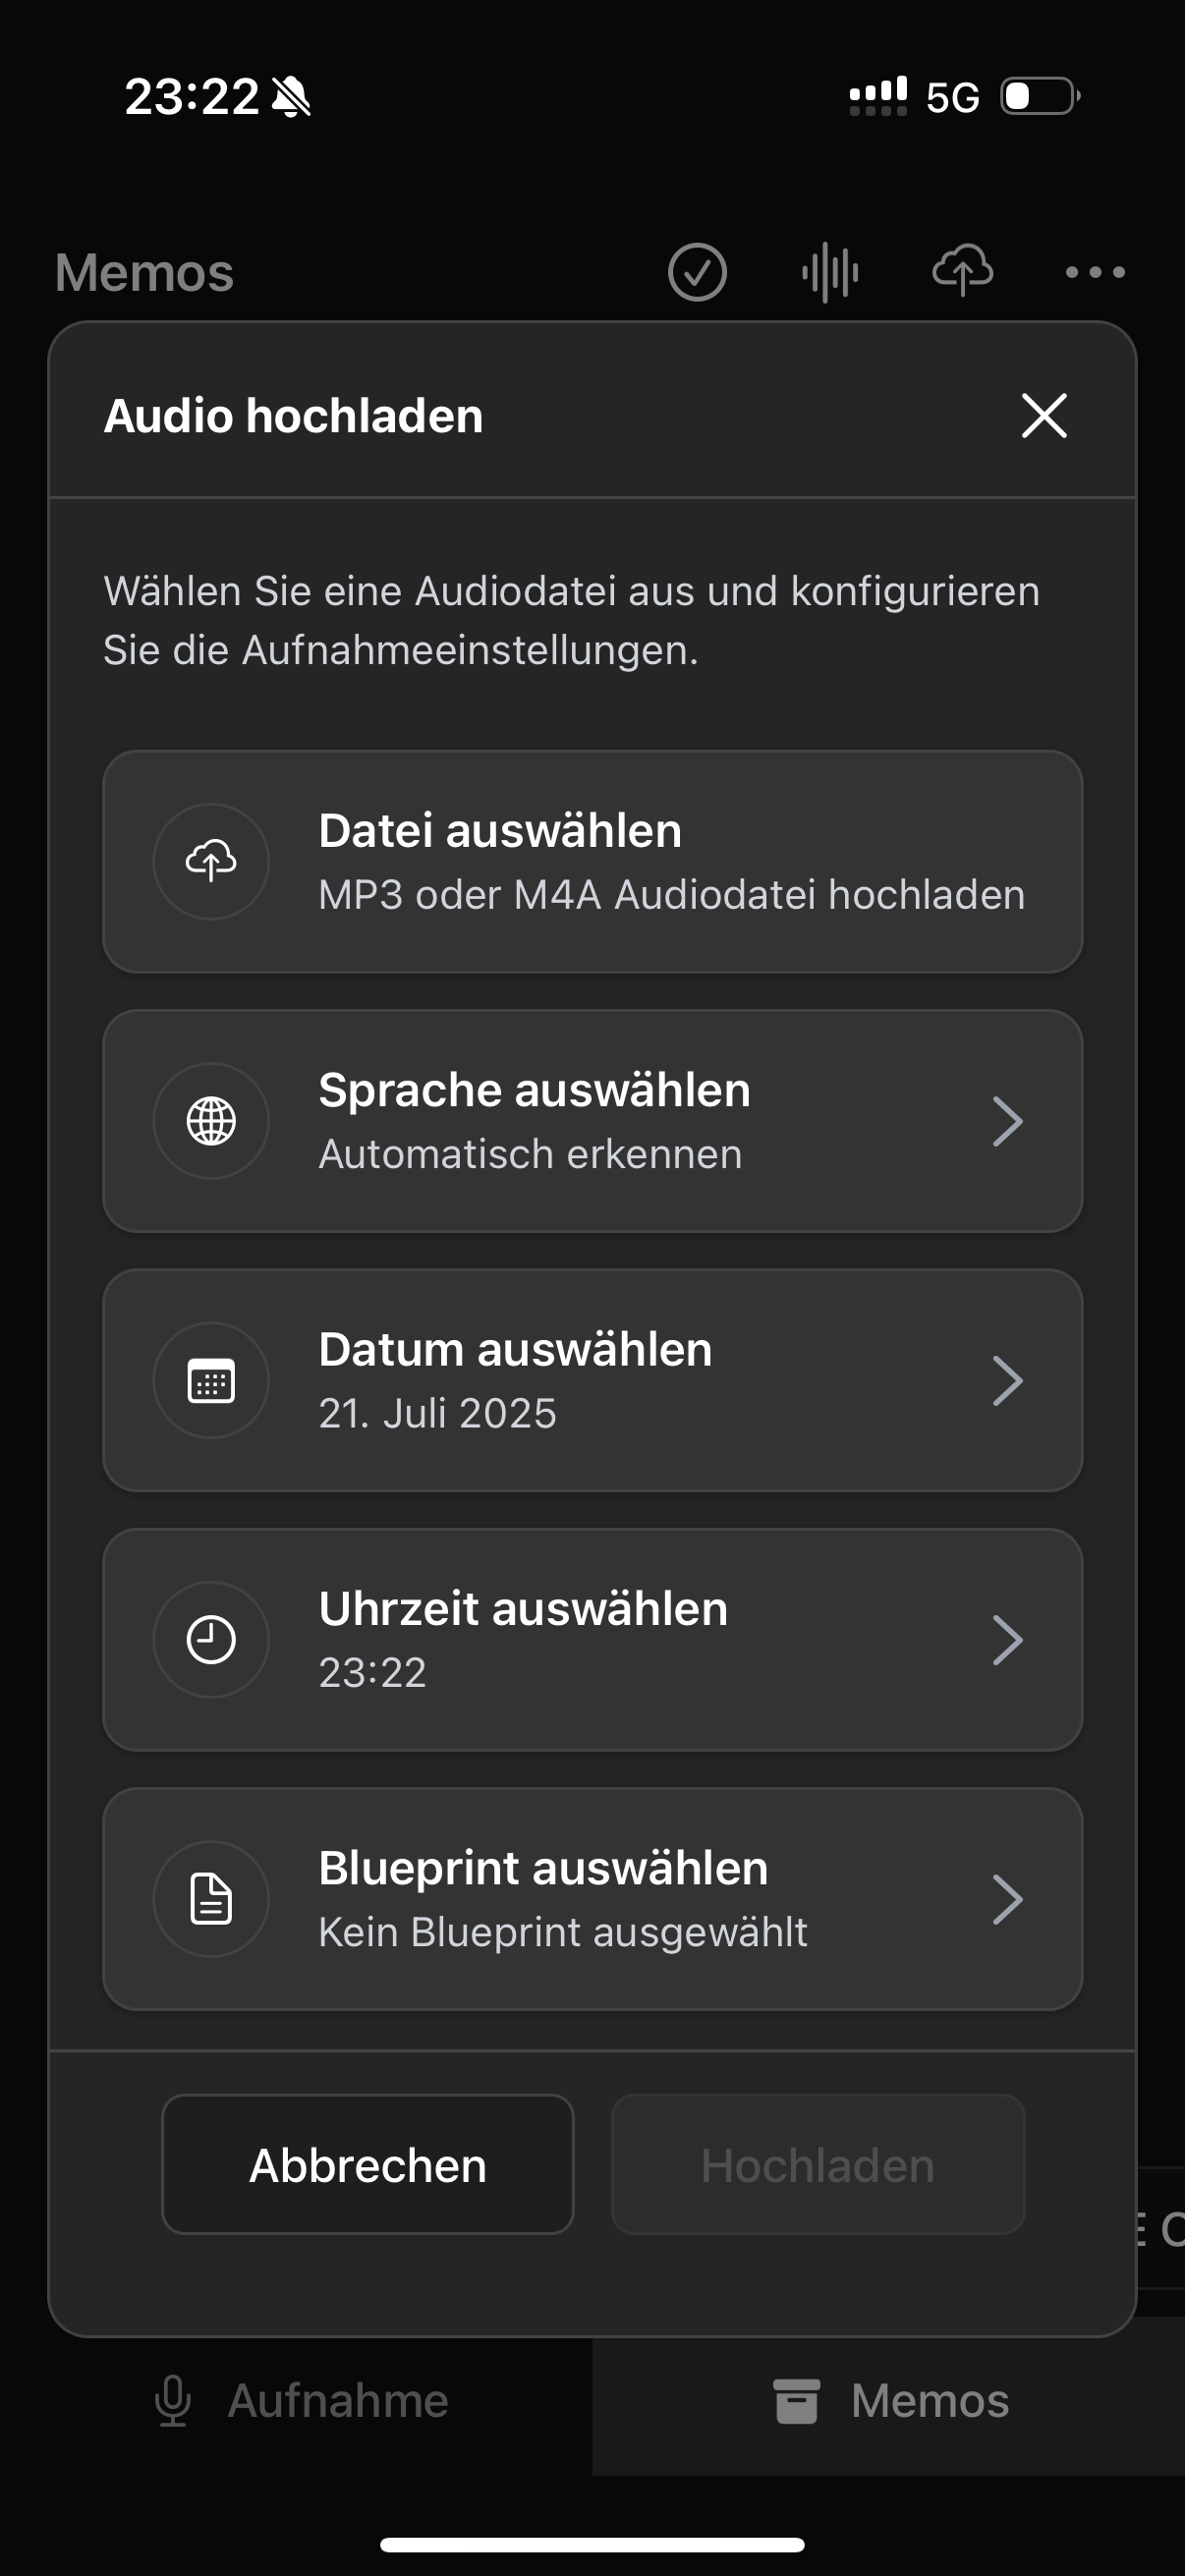
Configure your audio file:
- Select File - Supported formats: MP3 or M4A
- Select Language - Auto-detect or set manually
- Select Date - Current date or adjust
- Select Time - Automatic or adjust
- Select Blueprint (optional) - For optimized processing
🚀 Start Upload
After configuring:
- Click “Upload”
- File is uploaded - Automatic transcription starts
- Recording appears in Memos list - After processing completes

💡 Tips for Best Results
- Good Audio Quality - Ensure clear recordings for best transcription results
- Processing Time - For longer recordings, processing may take a few minutes
- Continue Working - You can continue using the app during upload
- Supported Formats - MP3 and M4A work best
Was this guide helpful?